Reading time ~9 minutes
Building an AppRunner on EC2 with Cloudflare Zero Trust Access
I’ve been wanting to build a personal “AppRunner” for a while now - a single long-running EC2 instance that can host all the small internal apps I need to access occasionally. Rather than spinning up separate ECS clusters or tasks for each app, which quickly becomes costly, this approach lets me consolidate everything in one place while keeping costs down.
My main requirements were:
- The apps should be internal only. Although they should not exposed to the internet, they should be reachable from anywhere.
- The apps should be accessible via zero-trust. No keys, no VPN, no bastion host. So Cloudflare Access was a natural choice.
- The setup should be fully automated (I don’t want to start creating EC2 instances manually, or copying files around).
- Every app should be running as a separate container, configured by its own
docker-composefile. - The instance should be long-lived, but I didn’t want to start managing it as a “pet”. I wanted to be able to destroy it and recreate it at any time without losing data.
- No. Kubernetes is an overkill for this.

⌨️ marco-lancini/utils
A First (Ugly) Attempt
The Setup
I started by creating a reproducible way to set up an EC2 instance with the necessary roles, networking and security groups:
# ==============================================================================
# AMI
# ==============================================================================
data "aws_ami" "amazon_linux_2023" {
  most_recent = true

  filter {
    name   = "owner-alias"
    values = ["amazon"]
  }

  filter {
    name   = "name"
    values = ["al2023-ami-2023*"]
  }

  filter {
    name   = "root-device-type"
    values = ["ebs"]
  }

  filter {
    name   = "virtualization-type"
    values = ["hvm"]
  }

  filter {
    name   = "architecture"
    values = ["x86_64"]
  }
}

# ==============================================================================
# EC2 Instance
# ==============================================================================
module "ec2_instance" {
  source = "../../components/aws/aws-private-ec2"

  prefix = var.prefix

  instance_type = var.instance_type
  ami_id        = data.aws_ami.amazon_linux_2023.id

  instance_user_data = local.instance_user_data
  instance_state     = var.instance_state

  tags = var.tags
}
The aws-private-ec2 module referenced above creates:
- A VPC with a public subnet and an Internet Gateway
- A security group that only allows egress to the internet
- A role for the instance that allows usage of SSM
- An EC2 instance with the AMI and user data provided
Now, for making it fully private, I should have placed it in a private subnet. But here costs are an important factor, so I decided to put it in a public one to avoid paying for a NAT Gateway. As a mitigation, the security group does not allow any ingress, only egress.
Next problem, how to pass workloads to the instance?
One requirement was that everything had to run as a container.
Since I rely heavily on docker-compose for all my apps, I started to look for ways to automate the “deployment” of the apps on the instance.
I didn’t want to start messing with heavy tools like Ansible, and luckily HashiCorp itself recommends cloud-init as a way to provision instances.
So, after a bit of research troubleshooting, I ended up with the following cloud-config file:
1
2
3
4
5
6
7
8
9
10
11
12
13
14
15
16
17
18
19
20
21
22
23
24
25
26
27
28
29
30
31
32
33
34
35
36
37
38
39
40
41
42
43
44
45
46
47
48
49
50
51
52
53
54
55
56
57
58
59
60
61
62
63
64
65
66
67
68
69
70
71
72
73
74
75
76
77
78
79
80
81
82
83
84
85
86
87
88
89
90
#cloud-config
# https://cloudinit.readthedocs.io

#
# General settings
#
hostname: apprunner
timezone: Europe/London
locale: en_GB.UTF-8
keyboard:
  layout: gb
  variant: ''


#
# Group definitions
#
groups:
  - ubuntu: [root,sys]
  - apps
  - docker

#
# Users definitions
#
users:
  - default
  - name: apps
    gecos: apps
    shell: /bin/bash
    primary_group: apps
    sudo: ALL=(ALL) NOPASSWD:ALL
    groups: users, admin, docker
    lock_passwd: false
    homedir: /home/apps/

#
# Package definitions
#
package_update: true
package_upgrade: true
packages:
  - ca-certificates
  - docker

#
# Files
#
write_files:
  - path: /home/apps/sample/docker-compose.yml
    content: |
      services:
        cloudflared:
          image: ${cloudflared_sample_image}:latest
          environment:
            - ORIGIN_URL=${cloudflared_sample_origin_url}
            - TUNNEL_UUID=${cloudflared_sample_tunnel_uuid}
            - TUNNEL_CREDENTIALS_SSM_NAME=${cloudflared_sample_tunnel_credentials_ssm_name}
          depends_on:
            - nginx
        nginx:
          image: nginx:latest
          ports:
            - "80:80"

#
# Startup commands
#
runcmd:
  # Start the SSM agent
  - sudo systemctl enable amazon-ssm-agent
  - sudo systemctl start amazon-ssm-agent
  # Install Docker
  - sudo systemctl enable docker
  - sudo systemctl start docker
  # Install Docker Compose
  - sudo curl -L "https://github.com/docker/compose/releases/download/v2.29.7/docker-compose-linux-x86_64" -o /usr/local/bin/docker-compose
  - sudo chmod +x /usr/local/bin/docker-compose
  # Install micro
  - cd /tmp/
  - curl https://getmic.ro | bash
  - sudo mv micro /usr/local/bin
  # Switch to the apps user
  - sudo su apps
  # Chown user directory
  - sudo chown -R apps:apps /home/apps/
  # Login to ECR
  - aws ecr get-login-password --region eu-west-1 | docker login --username AWS --password-stdin ${cloudflared_sample_image}:latest
  # Start Docker Compose
  - cd /home/apps/sample && docker-compose up -d
- Lines
7-12: Defines some general settings like the hostname, timezone, and locale. - Lines
18-21: Defines two new groups,appsanddocker. - Lines
26-35: Defines a new user namedapps, assigns it to theappsanddockergroups, gives it sudo access, and sets its home directory to/home/apps. - Lines
40-44: Updates the package list and install a few dependencies likeca-certificatesanddocker. - Lines
49-64: Here we define which files to write to the instance. In this case, we “deploy” asampleapp by writing adocker-compose.ymlfile to/home/apps/sample/docker-compose.yml. - Lines
69-90: These are the commands that will be executed when the instance starts. We start the SSM agent, install Docker, Docker Compose, andmicro(a terminal-based text editor), switch to theappsuser, and finally start thedocker-composeapp.
If you look closely at lines 49-64, you’ll see that we’re using Terraform variables to inject values into the file.
In fact, since I wanted the entire provisioning to be automated, some variables in this cloud-config file come from Terraform itself:
locals {
  instance_user_data = templatefile("${path.module}/ec2-apps/cloud-config.yaml", {
    cloudflared_sample_image = aws_ecr_repository.cloudflared.repository_url,

    cloudflared_sample_origin_url                  = local.app_sample_tunnel_origin,
    cloudflared_sample_tunnel_uuid                 = module.sample_tunnel.tunnel_id,
    cloudflared_sample_tunnel_credentials_ssm_name = module.sample_tunnel.tunnel_secret_ssm_name,
  })

  app_sample_name            = "sample"
  app_sample_tunnel_port     = 80
  app_sample_tunnel_origin   = "http://nginx:${local.app_sample_tunnel_port}"
  app_sample_tunnel_hostname = "sample.securitybite.com"
}
You can see that we’re injecting the cloudflared_sample_image from an ECR repository, and a few variables needed to create a Cloudflare Tunnel and Access Application:
module "sample_tunnel" {
  source = "../../components/cloudflare/cloudflare-zt-app/"

  # Cloudflare Config
  cloudflare_account_id = var.cloudflare_account_id
  cloudflare_zone_id    = var.cloudflare_zone_id

  # Cloudflare Tunnel
  tunnel_name     = "${var.prefix}_${local.app_sample_name}"
  tunnel_dnsname  = local.app_sample_name
  tunnel_hostname = local.app_sample_tunnel_hostname
  tunnel_origin   = local.app_sample_tunnel_origin

  # Cloudflare Access Application
  cloudflare_app_name           = "${var.prefix}_${local.app_sample_name}"
  cloudflare_app_allowed_emails = var.cloudflare_app_allowed_emails
}
The cloudflare-access-app module referenced above creates:
- A self-hosted Cloudflare Access application, with an access policy that requires a user to be a member of a specified group in order to access the application.
- A Cloudflare Tunnel that connects the application to a specified origin server.
- A DNS Record that points to the Cloudflare Tunnel.
- An SSM Parameter that contains the Cloudflare Tunnel configuration (ID/secret).

If you are not familiar with Cloudflare Access, it’s a service that allows you to protect internal resources by allowing access without exposing the app to the public Internet, and by requiring users to authenticate with Cloudflare before accessing them. I’ve blogged about it before, and you can find more information at Remotely Access your Kubernetes Lab with Cloudflare Tunnel and Zero Trust Access to Private Webapps on AWS ECS with Cloudflare Tunnel.

The Result
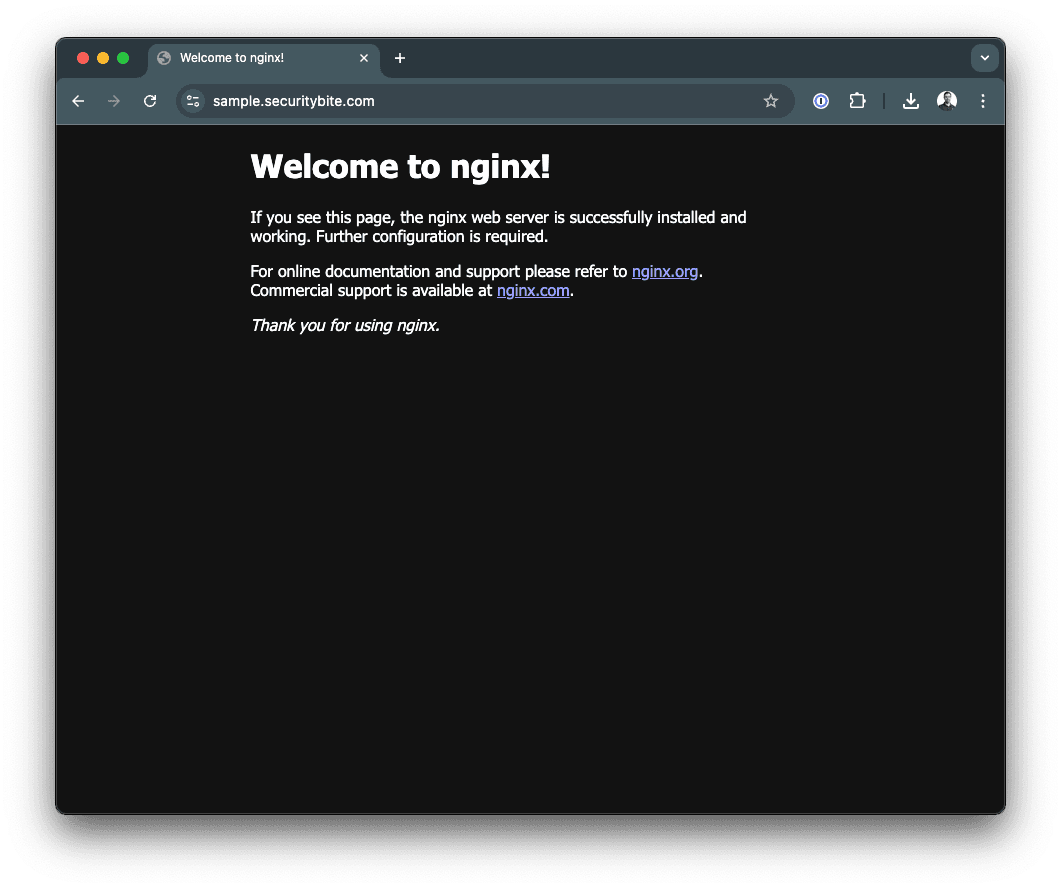
This actually worked just fine.
Once setup, I could access the apps via the Cloudflare Tunnel, and thanks to AWS SSM I could access the instance itself without opening SSH to the internet.
╰╴❯ aws ssm start-session --target i-xxxxxx

Starting session with SessionId: sso-marco-xxxxx
sh-5.2$ sudo su apps
bash-5.2$ whoami
apps
The Problems
The main problem with this setup was that every time I wanted to add a new app, I had to:
- Extend
cloud-config.yamlto include the new app, both inwrite_filesandruncmd. - Extend
locals.tfto include the new app, both ininstance_user_dataand in the app specific variables. - Add new
app-<app>.tffile with relevant Terraform resources for the Cloudflare Access Application and Tunnel.
As said, this worked fine, but it was clearly a hack.
It is not really flexible to configure services this way.
Plus, every time you replaced the user_data, the instance would have to be replaced as well.
So I had to compromise on some requirements.
📙 The CloudSec Engineer is out now!
What I Settled For
Since I use a custom-made command line tool (based on Python Click) to automate some workflows on my laptop, I decided to extend it and use Fabric to automate copy/setup of the apps on the instance.
The major drawback of this approach is that some basic operations like scp-ing files to the instance still require a keypair.
But I can live with that, especially since I can retrieve the private key at runtime from the 1Password CLI.
So here is how it looks like.
The instance itself is still managed in Terraform, but the user_data is now a simple cloud-config.yaml that only installs Docker and Docker Compose.
The only changes to the instance configuration are due to SSH: I had to add a new rule in the security group to allow ingress for SSH, and a SSH keypair to allow access.
The provisioning of Cloudflare Access Applications and Tunnels is still managed in Terraform, but in a simplified way.
The user_data does not contain any app-specific configuration anymore, and I can use a map to define all the apps I want to run:
locals {
  apprunner_apps = {
    sample = {
      name     = "sample"
      origin   = "http://nginx:80"
      hostname = "sample.securitybite.com"
    }
    other = {
      name     = "other"
      origin   = "http://127.0.0.1:8080"
      hostname = "other.securitybite.com"
    }
  }
}

module "cf_apps" {
  for_each = var.apps
  source   = "../../components/cloudflare/cloudflare-access-app/"

  # Cloudflare Config
  cloudflare_account_id = var.cloudflare_account_id
  cloudflare_zone_id    = var.cloudflare_zone_id

  # Cloudflare Tunnel
  tunnel_name     = "${var.prefix}_${each.value.name}"
  tunnel_dnsname  = each.value.name
  tunnel_hostname = each.value.hostname
  tunnel_origin   = each.value.origin

  # Cloudflare Access Application
  cloudflare_app_name           = "${var.prefix}_${each.value.name}"
  cloudflare_app_allowed_emails = var.cloudflare_app_allowed_emails

  tags = var.tags
}
When I need to add a new app, I just need to extend the apprunner_apps map in local.tf and add the relevant docker-compose.yaml file to the apprunner folder.
Then, my CLI tool will take care of the rest.
For example, here is a snippet with simple functions to connect to the instance and copy a folder:
def fabric_connect(hostname):
    # Set SSH_AUTH_SOCK to the 1Password IdentityAgent path
    os.environ["SSH_AUTH_SOCK"] = cs.ONEPASSWORD_SSH_AUTH_SOCK

    # Connect
    c = Connection(hostname, user="ec2-user", connect_kwargs={"allow_agent": True})
    return c


def fabric_copy_folder(conn, local_folder, remote_folder):
    # Create the remote folder if it doesn't exist
    conn.run(f"mkdir -p {remote_folder}")

    # Recursively copy each file and subdirectory
    for root, dirs, files in os.walk(local_folder):
        # Determine the path on the remote server
        relative_path = os.path.relpath(root, local_folder)
        remote_path = os.path.join(remote_folder, relative_path)

        # Ensure the remote subdirectories exist
        conn.run(f"mkdir -p {remote_path}")

        # Upload each file in the current directory
        for file in files:
            local_path = os.path.join(root, file)
            remote_file_path = os.path.join(remote_path, file)
conn.put(local_path, remote_file_path)⌨️ marco-lancini/utils
Conclusions
In this post, I explained how automated the deployment of an instance on AWS that hosts multiple internal apps securely behind Cloudflare’s zero-trust access controls.
It is clearly a hack, but it works for my use case. Plus, I learnt a lot about cloud-init and Fabric in the process.
I hope you found this post valuable and interesting, and I’m keen to get feedback on it! If you find the information shared helpful, if something is missing, or if you have ideas on improving it, please let me know on 🐣 Twitter or at 📢 feedback.marcolancini.it.
Thank you! 🙇♂️